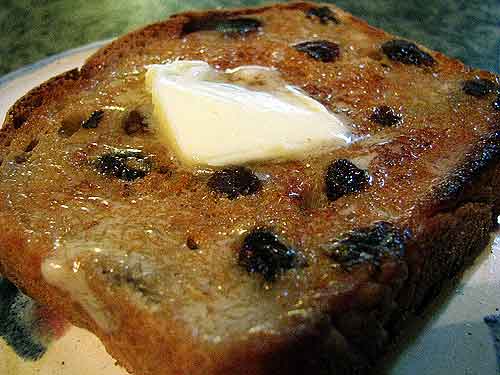
Sweet, juicy, warm, and gooey. Raisin bread! Don’t you just want to toast a big, fat slice of it right now, slather it with butter, and sit down with a steaming cup of coffee to go with? Best of all, it’s a Grandmother Bread recipe.
But first….. I get a lot of questions about breadmaking. In the next few weeks, I’m going to be sneaking some simple secrets to great bread into my regular bread posts. A lot of these secrets aren’t secrets at all-but they’re things that aren’t always on the minds of new breadmakers. After all, when you’re just figuring out how to knead dough and other basics, some seemingly obvious side notes aren’t always so obvious. One of the most common questions I hear is, “How do you get such high loaves?”
Answer: Size matters.
(Get your mind out of the gutter!)
I’m talking about bread pans. I have a lot of bread pans.
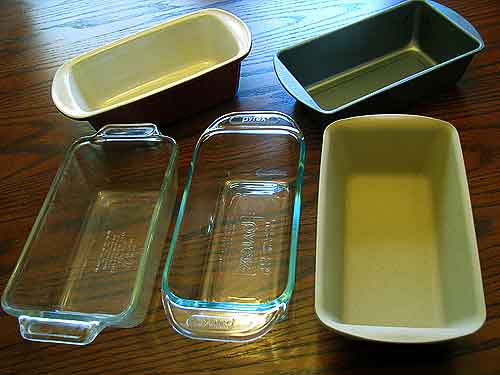
Metal pans, glass pans, stoneware, big ones, little ones, miniature ones, I’ve got it all in a bread pan. Which is my favorite? Glass bread pans. I like the way bread bakes in a glass pan-the crust is just a bit crustier. I also like being able to look at the bread all over when I’m deciding if it’s done.
But not all glass bread pans are created equal.
Notice the pan in the middle is wider than the pans on either side. This inequity impacts the final product. See the bread rising higher in the narrower loaf pan here.
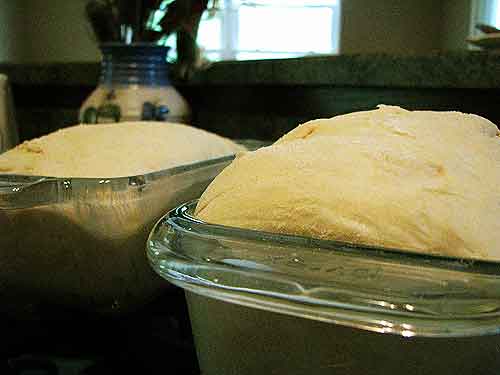
And of course, when it bakes up, the loaf in the narrower pan is higher.
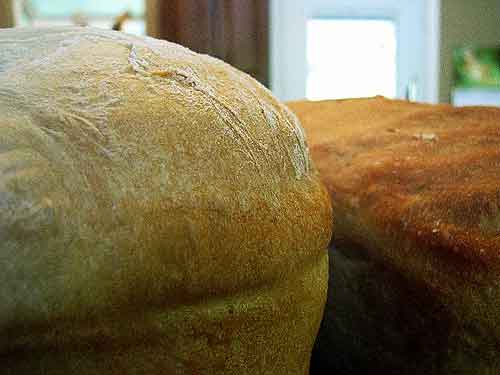
As I said, this is a seemingly obvious secret, but if you only have one or two bread pans, nothing to compare them to, you might not have thought about it.
On a related note, even with a narrower pan, your bread might not turn out high and lovely if the recipe is too small. Some bread recipes aren’t crafted to create high loaves-they simply don’t turn out enough dough. If you’re already using narrow pans and have a bread recipe that isn’t making high loaves for you, consider increasing the recipe (and subsequent baking time) by a quarter or a third to build a bigger loaf.
My Grandmother Bread recipe calls for two-and-a-half to three cups of water to start the dough. I almost always use three cups to guarantee high loaves.
One more note, use homemade dough enhancer for higher, lighter loaves (particularly when using whole grains). If you’ve never made bread before, see how to make bread.
Oh-are you ready for the raisin bread? This is the traditional Grandmother Bread recipe, cut in half for one loaf, with raisins added and some additional sugary sweetness.
How to make Raisin Bread:
1 1/2 cups very warm water
1 package yeast
1/4 teaspoon salt
1/4 cup sugar
1 cup raisins
3 cups all-purpose flour (more or less!)
In a large bowl, combine water, yeast, sugar, salt, and raisins. Let sit five minutes. Stir in the first cup and a half of flour with a heavy spoon. Add the next cup of flour a little at a time as needed, stirring until dough becomes too stiff to continue stirring easily. Add a little more flour and begin kneading. The 3 cups flour is approximate–your mileage may vary! Continue adding flour and kneading until the dough is smooth and elastic. Let dough rise in a greased, covered bowl until doubled. (Usually, about an hour.) Uncover bowl; sprinkle in a little more flour and knead briefly before shaping dough into a loaf. Place in a greased loaf pan and cover with greased wax paper or a wet paper towel. Let rise until loaf is tall and beautiful! (About an hour, depending on the temperature in your kitchen.)
Bake for 25 minutes in a preheated 350-degree oven.
Note: I replaced one cup of the all-purpose flour with whole wheat flour in this recipe. You can use straight all-purpose flour, part whole wheat as I did, or make it all whole wheat. (Use homemade dough enhancer if you’re making it with all whole wheat!)
Mmmmmm. Want some? (For you experienced breadmakers, got any tips for tall loaves you want to share?)
The Farmhouse Table Index-See All My Recipes
 Printable Recipe
Posted by Suzanne McMinn @ 1:05 am |
Permalink
Related Posts
Apple butter in autumn is an Appalachian tradition. Historically, it’s a day-long event. Whole families would join together to simmer apple butter in copper kettles as big as wash tubs. This tradition is largely lost, but you can still find communities coming together over apple butter. The little church in town is making apple butter this weekend, the old-time way, in a copper kettle, and it’ll take all day. But you can make it at home and it’s just as good-minus the copper kettle ambience. I love apple butter. Apple butter is one of the traditions my father brought with him when he left these hills long ago after World War II. I grew up on apple butter and yes, sometimes I thought it was odd. None of my friends had apple butter at their house. But we did. I still love apple butter today, so it’s been fun to learn how to make it. I learned straight from the feet of Georgia, so I figure mine’s as traditional as it gets without getting out a copper kettle, though of course I couldn’t resist playing around with the recipe a bit.
First, you gotta get some apples and I got mine the old-fashioned way, off the apple tree behind the old farmhouse. First, you gotta shake the tree.
I would tell you how many apples hit me on the head, but that would be embarrassing.
For each batch per this recipe, you’ll need about four pounds (maybe 16 medium) apples (or more if your apples are small, like the ones off the old apple tree).
Cut, peel (if you must, see note), and core them. Place in a large pot; bring to a boil and simmer until soft but not liquified. Puree using a food processor or food mill.
Note: I don’t peel them. I just cut, core, and cook. I use a food mill, and by the time the apples go through the food mill, the peel is pretty well strained out. (It’s so much easier not to peel!)
What you want to end up with is two quarts of apple pulp (per recipe batch).
Don’t know how to can? Learn how here.
How to make Apple Butter:
2 quarts apple pulp
4 cups sugar
2 teaspoons cinnamon
1/2 teaspoon cloves
Combine apple pulp, sugar, and spices in a large pot. Simmer slowly until mixture thickens and rounds up on a spoon. (May take a couple of hours.) Stir frequently. Ladle hot butter into jars, leaving 1/4-inch headspace. Put on lids and bands. Process in a hot water bath for ten minutes. For me, this makes about five and a half jars (half-pint size). You can double, triple, etc, the recipe to make as much as you want. Your house will smell great while it’s cooking!
And oh my, this is good. Yet I had to play with the recipe anyway. What’s good with apples? Raisins! How about a little rum? And I made the best apple butter in the history of apple butter. Don’t ask me for my research to back up this claim. I have none. I just know.
How to make Rum-Raisin Apple Butter:
Per the 2-quarts apple butter in the above recipe, add 1 cup raisins when combining the apple and spices in the pot to begin simmering. Toward the end of the simmering time, as the mixture is thickening, add 1/2 cup rum. (Don’t add the rum earlier as you don’t want all the good rum flavor to boil away!) Simmer a little while longer until mixture is thick and ready for canning, and can as per the previous instructions.
Spread it on some toasted Grandmother Bread and it’s just outrageous.
And then, as if this isn’t enough goodness, I made coffee cake. With apple butter. YUM. This recipe is similar to biscuit twists, except instead of separating the dough into twists, you bake it all together and slice it. And it’s so easy!!
How to make Easy Apple Butter Coffee Cake:
3 ounces cream cheese
1/4 cup butter
2 cups Quick Mix or other baking mix
1 tablespoon sugar
3/4 cup milk
approximately 3/4 of one jam-sized (half-pint) jar of apple butter (or any jam of choice)
Cut cream cheese and butter into baking mix plus the one tablespoon of added sugar using a pastry cutter. (If you don’t want this to be as sweet, leave the extra sugar out. Depends on your sweet tooth!) Add milk. Mixture may seem a little dry; knead with your hands to work in remaining dry ingredients and form a soft ball. (If your mixture is too wet, add a little more flour, but it should be just right now.) Roll out on floured waxed paper, sprinkling flour on top, too, into an approximately 12×8 rectangle. Transfer dough to a greased cookie sheet. Make two and a half inch cuts all along the long sides. Spread most of a half-pint jar of apple butter down the center. Criss-cross cut strips of dough over the top and pinch ends to seal. Bake in a 375-degree oven for 25 minutes or till nicely browned on top. Drizzle with powdered sugar icing.
Powdered Sugar Icing:
Combine 1/2 cup sifted powdered sugar, 1/4 teaspoon vanilla, and enough milk (one to two teaspoons) for drizzling consistency.
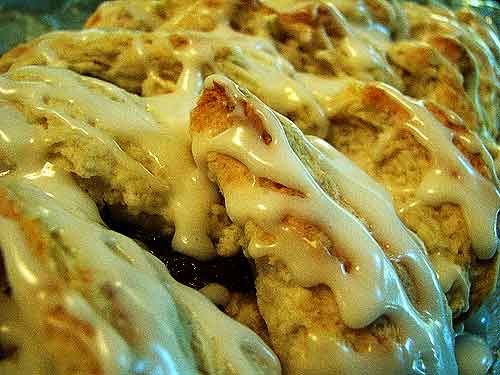
Who wants some apple butter coffee cake?
The Farmhouse Table Index-See All My Recipes
Printable Recipe
Posted by Suzanne McMinn @ 1:05 am |
Permalink
Related Posts