


Posted by Suzanne McMinn @ 1:05 am | Permalink
Daily Farmhouse Journal
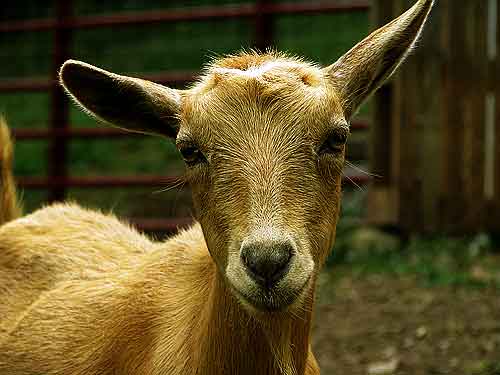
Fresh milk. It’s an amazing thing. Goat milk is sweet and rich, perfect for cheese and baking and anything else for which you would use store-bought milk. And you made it yourself-you and your goat. But if you’ve never milked before, how to handle milk properly can be a bit of mystery. I know it was for me. I read the books. I researched online. And what I wished I had were pictures. I’m a visual learner. I want pictures.
And so this post is for those of you who are either thinking about milking at home sometime in the future, preparing to milk sometime soon, or just plain curious even if you never intend to milk anything. Note: If you are preparing to milk at home-I am not an expert and I don’t play one on the internet. Please consult expert sources such as Storey’s Guide to Raising Dairy Goats, Raising Milk Goats Successfully, and the Fias Co Farm website. This post is not intended to be a how-to guide. Rather, it is intended to be an accompaniment in pictures to expert sources such as those I’ve listed. (If you have arrived at this post via a search engine at some later date from its posting, please also read the comments to this post as I have high hopes there will be great advice in there as well from far more experienced milkers than me.)
What you will need-
*a stainless steel milking pail
*a strainer
*milk filters
*bleach
*dishwashing liquid
*small stainless steel bowl for the udder wash
*teat dip cup
*some sort of strip cup
*paper towels
*water
*containers to hold your filtered milk (glass preferable)
I relied most heavily in my decision-making regarding milk handling on the Fias Co Farm site as I found it to be the most practical, with consideration of other information from books. However, the writers of that site were milking quite a number of full-sized goats. I am milking one small Nigerian Dwarf doe. I downsized the Fias Co Farm instructions for the amount of milk I would be handling and the practical considerations of milking one small goat.
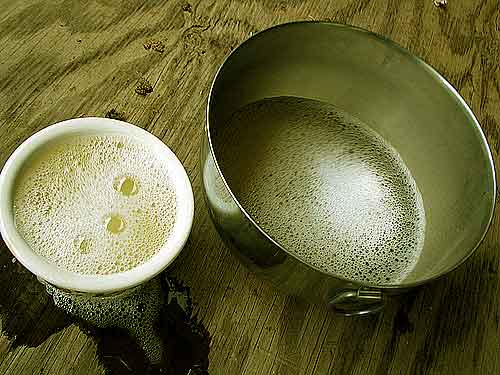
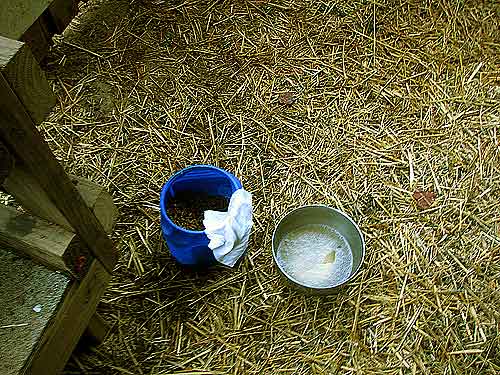
Each morning, when I prepare to milk Clover, I assemble my equipment, starting with the small bowl and cup I use for the udder wash and teat dip.
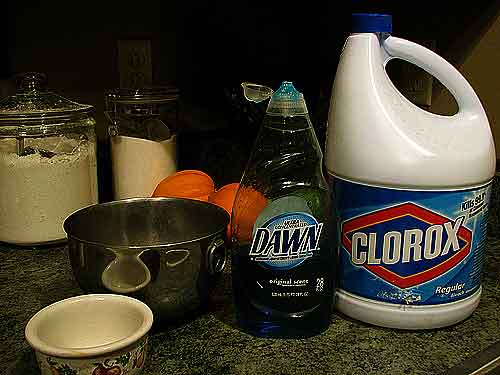
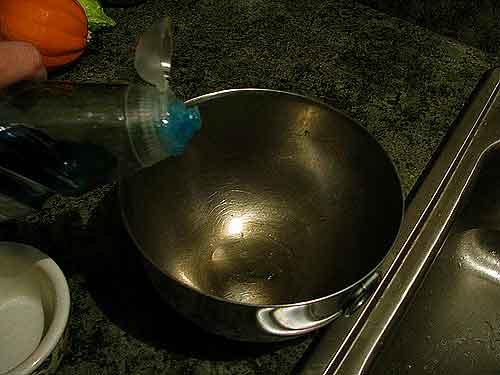
I use Clorox bleach and Dawn original blue dishwashing liquid for the udder wash and teat dip. I do not measure. (Consult the Fias Co Farm site for her measurement instructions.) I don’t measure because I’m dealing with one small doe and one small bowl. I drop a small splash of bleach in the stainless steel bowl, followed by a drop of Dawn.
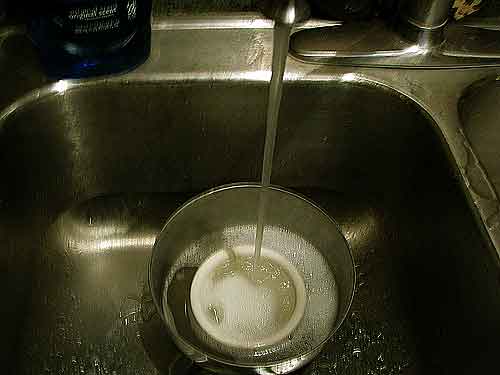
I place the bowl under hot running water, then place the small teat dip cup in there to carry out to the milkstand.
Next I drop a larger splash of bleach into the milking pail in the sink and run hot water into the pail.
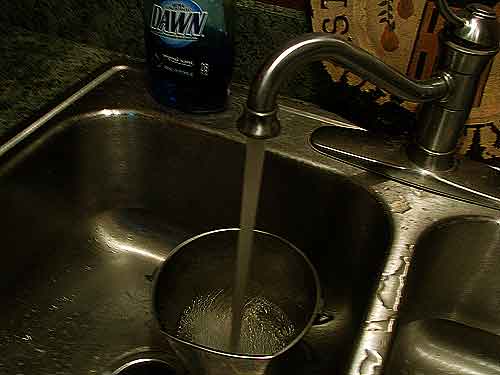
The Fias Co Farm site recommends filling the sink with hot water and bleach and immersing the pail. I find this far too wasteful of water and bleach for my purposes with one small pail. I just set the pail in the sink with that splash of bleach and fill it with hot water. I let it sit for a couple of minutes, then I pour some of the bleach water over the strainer to sanitize the strainer.
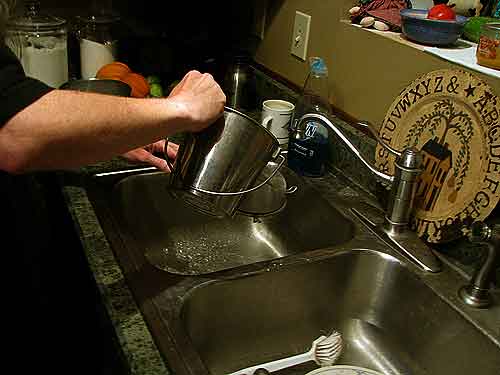
I set the strainer on a clean paper towel and pour out the rest of the water from the pail, slowly, turning the pail as I do so that the bleach water pours out over every inch of the pail’s rim. I dry the pail inside with a paper towel, then fold up a couple more fresh paper towels to take down to the milkstand with me and tuck them inside the pail.
To the milkstand, I carry my bowl of udder wash (with the teat dip cup nested inside) and my milking pail (clean paper towels tucked within).
Note: While I use the Fias Co Farm site’s solution for udder wash and teat dip, I’ve also seen recommendations including a vinegar solution as well as simply using alcohol-free baby wipes. Take your pick.
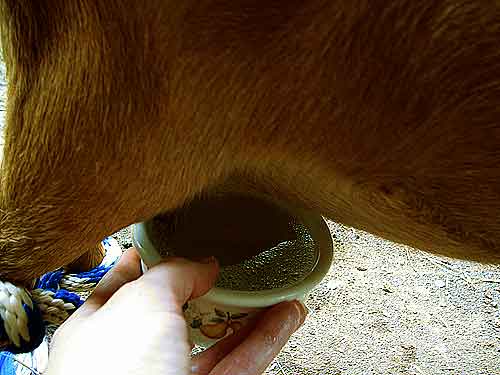
Once in the milking pen, I remove the teat dip cup from the larger udder wash bowl, making sure the teat dip cup is filled, and set it aside.
I soak a paper towel with the udder wash solution and wash Clover’s entire udder area, drying it with another paper towel.
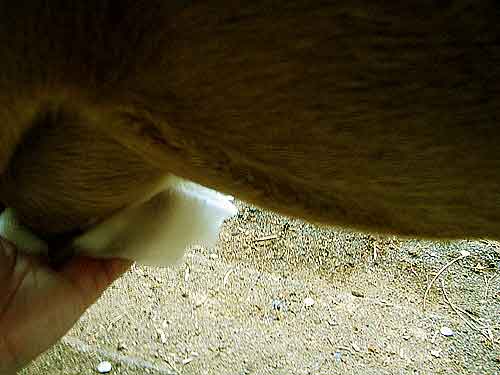
I dip my own hands in the remaining udder wash solution. I wash my hands throughout this entire process when I am in the kitchen, but once I’m in the milking pen, I don’t have access to a sink and I have already touched several things, so I sanitize my hands again by dipping them in the udder wash. 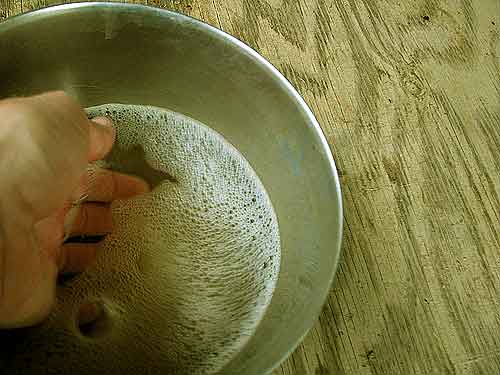
I use another paper towel to dry my hands and then I place that paper towel on the handle of the feed container. I will feed Clover several times during milking and I don’t want to directly touch the feed container again after my hands are sanitized.
Using your strip cup, draw out the first few squirts. The first few squirts contain bacteria that has collected in the teat and should be eliminated. It also allows you to check the milk for any abnormalities, which helps you keep an eye on your goat’s health and her milk. Then I set the strip cup aside to milk my lovely Clover and tell her how pretty she is. And she tells me how many cookies she wants for this daily violation of her person, but that is another story.
When I’m finished, I set the pail aside and pick up the teat dip. I dip her teats, scratch her behind the ears, and set her free.
I take the milk pail to the kitchen immediately. When milk leaves the udder, it is at 100 degrees. Ideally, it should be chilled to 38 degrees within one hour.

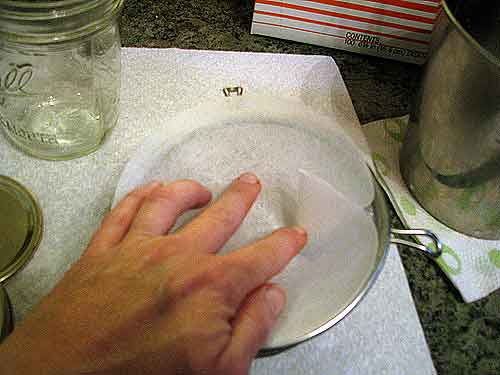
Before chilling the milk, I wash my hands then take out a fresh milk filter. Milk filters (available at farm supply stores) are somewhat similar to coffee filters, but not exactly. Get real milk filters. Don’t use coffee filters.
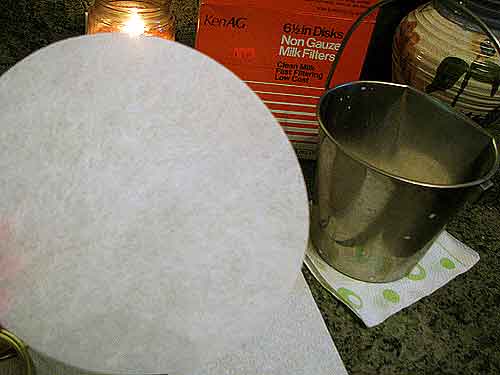
I place a milk filter inside the strainer.
Then I slowly pour the milk from the pail into the filtered strainer.
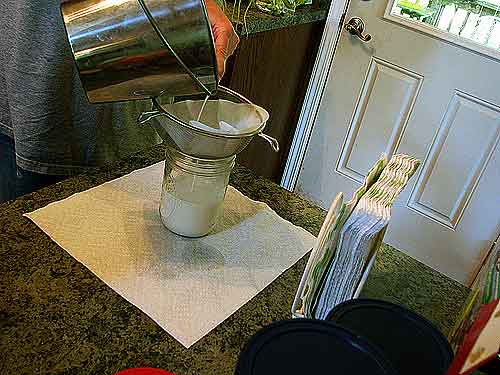
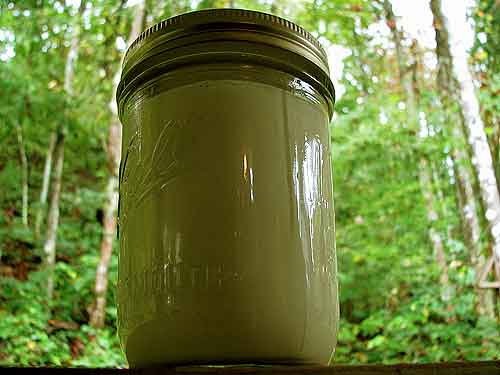
I use glass pint jars because I get a pint of milk from Clover per milking. I immediately place the pint jar in the freezer. Other ways to chill milk rapidly include placing the milk inside a bowl of ice water in the refrigerator or even specialized milk cooling equipment (for the extensive home dairy!). I find placing the pint jar in the freezer the simplest method for me, with my one pint of milk and my one little goat.
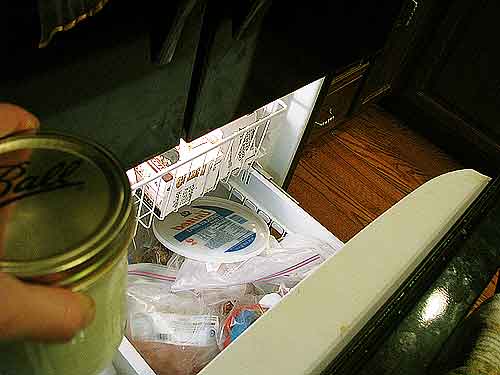
Wow, my freezer is a mess!
I leave about an inch of head space and even if I forget and leave the milk in there all day, it doesn’t blow up. I try to remember to take the jar out after about an hour. Then I place it in the fridge and it’s ready for baking or other uses.

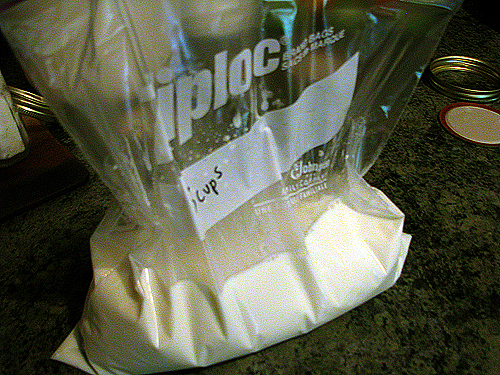
If I’m saving milk up or have more than I can use, I pour the chilled milk into a plastic freezer bag. Fresh milk can be stored in the refrigerator for a week or in the freezer for up to a year.
To pasteurize milk, heat it to 165 degrees for 15 seconds. (Do not use a microwave.) I do not pasteurize. I prefer to use raw milk. Raw milk vs. pasteurized milk is a weightier topic than I can explore, but in short, pasteurization, or heat-treating milk, was developed to protect the public from the potential of unsafe milk. FYI, it is illegal to sell raw milk in the United States. (Correction: This is true in most states, but not all. Thank you, Amy!) However, it is considered by many to be healthier and tastier than pasteurized milk, and the use of raw milk is widely practiced by home milkers (as it was by our grannies) who know their sanitation procedures, their goat’s health, and how swiftly they will store and use their milk. Please consult expert sources to make your own decisions if you are planning to milk at home.
After I’ve stored my milk properly, the milk pail is rinsed in cool water and wiped out, then the pail and other equipment goes straight into the dishwasher-from whence it will emerge the next morning, ready to be further sanitized and taken to the milking pen again. And every day, there is Clover, ready with a fresh supply of her sweet, rich milk.
Thank you, Clover! You are so pretty!! Would you like a cookie?