


Posted by Suzanne McMinn @ 5:05 am | Permalink
Tags: crafts, holidays
 Thinking about Valentine’s Day yet? You’d better get started! It’s almost the end of January! I’m giving you a two-week headstart to get ready with this idea-Love in a Jar. It’s good for lots of occasions, but especially Valentine’s Day. It’s inexpensive, easy, and sweet-just some paint, ribbon, a bit of prettily-wrapped candy, and a simple glass jar stuffed with hand-written love notes.
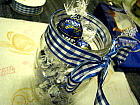
I made this jar for Georgia to thank her for all her kindnesses while we’ve stayed here in this old farmhouse. The jar contains four thank-you notes, one from each of us, to Georgia. I can talk about it on the internet without spoiling her surprise because Georgia doesn’t know how to get on the internet. This is handy because I can say anything I want about her. But I love her, so I’ll control myself. Though I did tell the world where she hides her cracker candy. Don’t tell her you heard it from me!
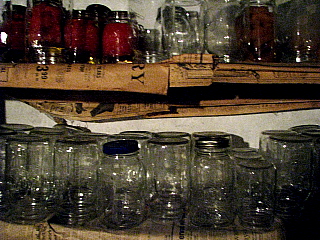 Start with a clean canning jar from the old cellar. If you don’t have an old cellar or any canning jars, a washed jelly jar or other glass container will do. By the middle of winter, we’re starting to have a lot of empty jars in the cellar. You’re also going to need some paint (nail polish will do), toothpicks, ribbon, glue, scissors, wrapped candies, and paper.
 Everything I know about painting, I learned from nail art books. In other words, we aren’t going to do anything real difficult here. I love nail art. I started doing it when my daughter was little, then she decided she didn’t like having her nails painted, but by then I was hooked on painting teeny tiny things on my fingers and toes and various other items.
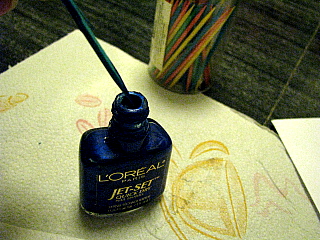
 Use fast-dry nail polish in whatever color scheme you’re going for with your jar. I’m using blue here because the pretty wrapped candy I found had blue wrappings, so I got hooked on a blue theme. Using a toothpick, dip the tip into the polish. I’m demonstrating here on a piece of paper before I work on the jar because it was easier to take photographs against the white paper than against glass.
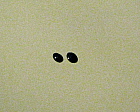
 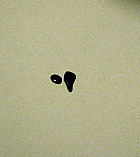 If you haven’t done this before, you might want to practice on a piece of paper before you get started on the jar. To make tiny hearts, make two little blobs of polish. Now dip the toothpick tip into one blob and pull the polish down to a point.
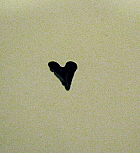 Repeat with the other blob, making the points meet to form a heart shape. See how easy that is? It doesn’t have to look perfect or even very good. This is a primitive craft! Primitive crafts hide a multitude of sins. And ineptitude.
I love primitive crafts.
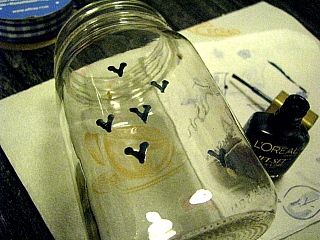 Now you’re an expert so you can get started on your glass jar. Paint however many hearts, in whatever pattern, you want. Go all the way around the jar. If you use fast-dry polish instead of paint, the whole process will go quickly. If you don’t like how anything comes out, just clean it off with nail polish remover and start over. I love fast-dry nail polish. And little hearts. When you’re satisfied, get out your ribbon.
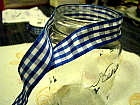
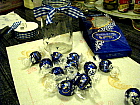
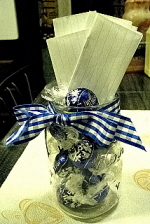 Cut your ribbon to a good length to tie a bow around the top of the jar. Cut it a little longer than you think you need and you can trim the ends. Using a bit of glue, attach the ribbon around the rim of the jar then tie neatly. Add wrapped candies and hand-written notes.
When the candy is all gone, the painted, ribboned jar will make a pretty keepsake for the notes.
Isn’t that fun? ![]()
Primitive Crafts & Country Style Index
Main How to Do Stuff Index

by: flowerthread on: September 26, 2008
by: flowerthread on: September 26, 2008
by: flowerthread on: September 26, 2008
by: Merilyn on: September 25, 2008
by: Jayne on: September 25, 2008